Certificates are a big challenge to export certificates from Neo and run them on Cloud Foundry to use Integration Suite. It is not a problem if you have few, but it you have them in your landscape, it becomes a bigger problem.
We would love to add this to the Figaf Tool as a part of our Neo to CF/integration Suite migration, but the use case would not be big enough to justify the effort of development and the API setup.
I instead wanted to create some simple code to handle the processing. We found that it was quite useful to deploy as an iflow. Originally I had considered if we needed to run it on the Neo system, but the certificate mapping is fully exposed via APIs.
It is only if you need a password or the private key you need to run in a Groovy script on the system.
We have created the following solution for it
- Deploy Iflow on a Cloud Integration System
- Configure it to the NEO API with authentication
- Configure filter for which certificate(s) to export
- Run the iflow, which produces two CF commands for each certificate
- Create the user roles in Cloud Integration
- Login to CF
- Run the commands provided by the tool
Now you can test it works.
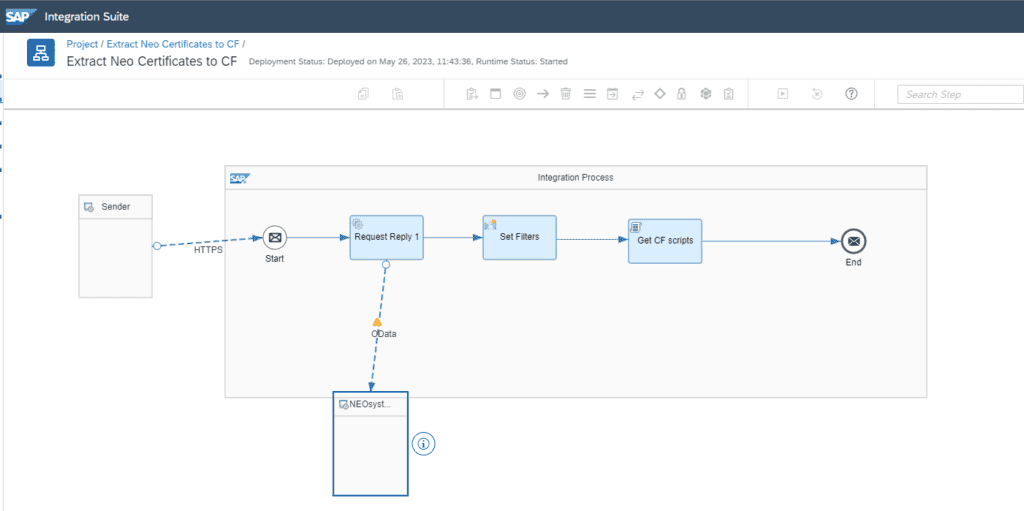
Iflow
We have created the iflow that should be deployed on one CPI tenant; it can be any of we have tested from Integration Suite and using the API of the Neo system.
You can download the iflow here.
We have tested with s-user access, but it should be possible with other options for authentication.
The iflow should be secured if you want, but it will just give certificate mappings so not the keys.
The iflow has the following parameters.
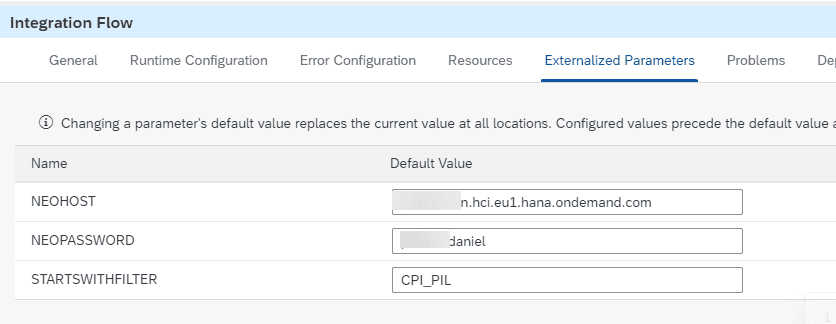
The host is the normal url you use to access the web in, and the user should be a username object on the current tenant.
Starts with the filter taking the certificates that begin with that value.
The code looks like the following.
import com.sap.gateway.ip.core.customdev.util.Message;
import java.util.HashMap;

import groovy.json.*


def Message processData(Message message) {
    //Body
     def headers = message.getHeaders();
    def filter = headers.get("FILTER");


    def body = message.getBody(java.lang.String);
def commandBuilder = new StringBuilder()

def rootNode = new XmlSlurper().parseText(body)

rootNode.CertificateUserMapping.each { mapping ->
    def user = mapping.User.text()

    if (user.startsWith(filter)) {
        def jsonContent = [
            "grant-types": ["client_credentials"],
            "redirect-uris": [],
            "roles": [user]
        ]
        def jsonStr = new JsonBuilder(jsonContent).toString().replace('"', '\\"')
        def command = "cf create-service it-rt integration-flow ${user} -c \"${jsonStr}\"\n"
       commandBuilder.append(command)
    }
}


rootNode.CertificateUserMapping.each { mapping ->
    def user = mapping.User.text()
    def cert = mapping.Certificate.text()

    if (user.startsWith(filter)) {
        //Certificates can be produced in  BASE64 then they need to be extraced
        def jsonContent = "";
        if(cert.startsWith("LS0t")){
            byte[] derCert = Base64.getDecoder().decode(cert)
            String newCert = (new String(derCert)).replaceAll("\r\n","")
             jsonContent = [
                "key-type": "certificate_external",
            "X.509": "${newCert}"
            ]

        }else{
            //if normla format
             jsonContent = [
                "key-type": "certificate_external",
            "X.509": "-----BEGIN CERTIFICATE----- ${cert} -----END CERTIFICATE-----"
            ]
        }

        def jsonStr = new JsonBuilder(jsonContent).toString().replace('"', '\\"')
        def command = "cf create-service-key ${user} ${user}key -c \"${jsonStr}\"\n"
        commandBuilder.append(command)
    }
}


    message.setBody(commandBuilder.toString());
    return message;
}
I decided to create all service instances first and then add certificates afterward. If you create a service key in UI it takes 30 seconds to be created, but using the command line is synchronously created so it probably does not matter.
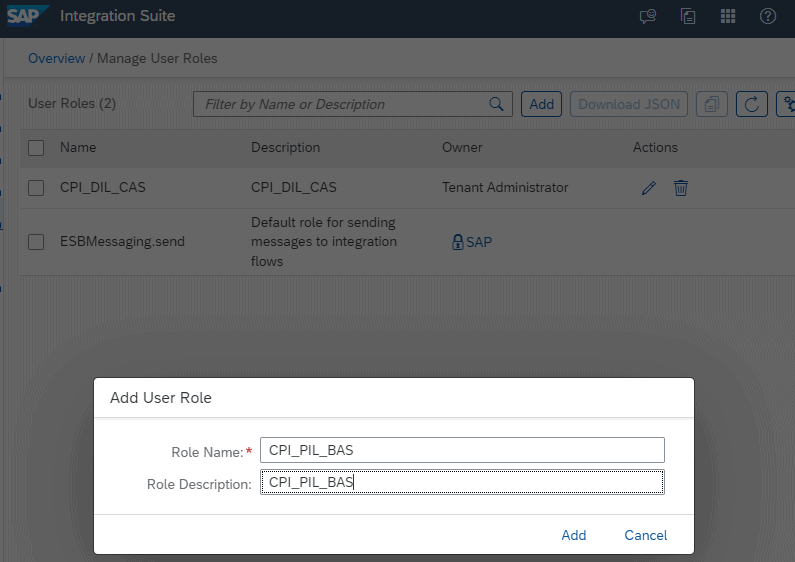
Create the Roles
The roles should be created manually in the Cloud Integration Tenant. It should have the same name as the certificate or you need to change the code to match your setup.
Create the commands
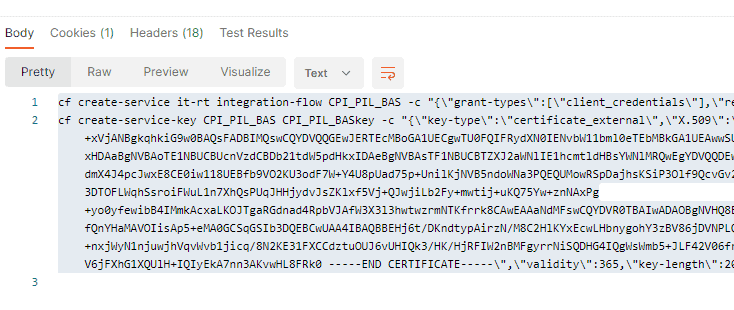
Trigger the iflow in Postman or what tool you use.
You should then see the commands in response.
Run commands
You need to have the CF commands in on your system. You can download it from here. We have seen some cases where you need to use cf7 instead of just cf.
In a terminal run
cf login -a https://api.cf.eu10-004.hana.ondemand.com/Login with your credentials and select the space.
Then run the commands to get create the certificates
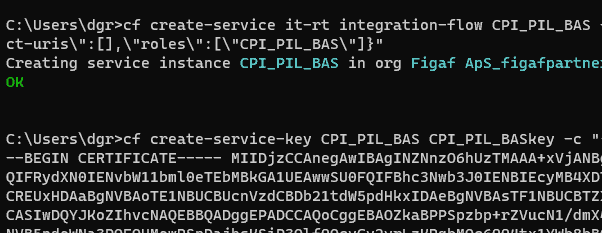
If you have many it may be an idea to add it to a bat file if you need to add many certificates.
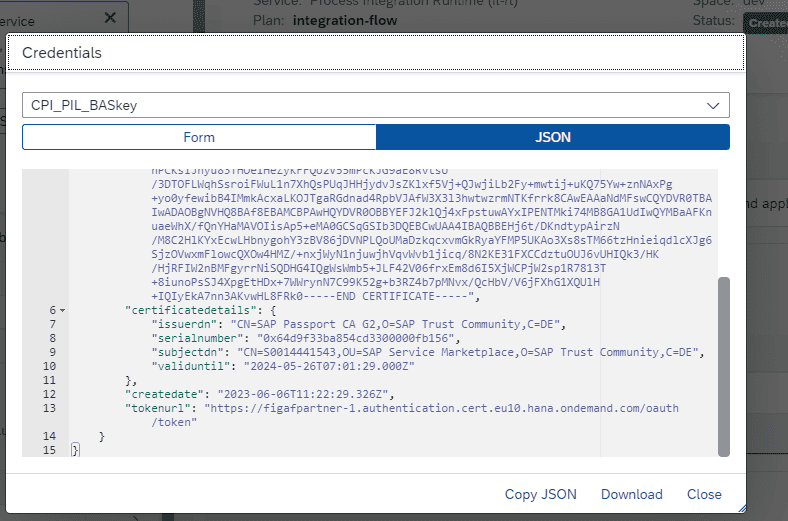
Once done you can see the certificate in instance and have a key there.
The json escape has been target for Windows, if you run Mac you need a different escape sequence.
Certificate types
While testing this, we found that certificates can be saved in the mapping in two formats, BASE64 and normal DER encoded. This is handed in the groovy code to exact the formats correctly.
Test
You should test the flow works as expected and you can use the certificates. There can be some limitations on which Certificate Authorities that are allowed on the Cloud Foundry.
Certificate expiry
The code does not check for certificate expiry, which is quite important to check. There is no reason to update the certificate and ask a partner to update url and then, 2 days later, ask them to change the certificate.
That brings me to the question how do you check the expiry of certificates? If you use the UI, you need to check all certificates and then compare the time for them. Here the Neo structure was a little easier to check and use API for.