Most of the times when you need to call a SAP Cloud Integration (CPI) iFlow in Integration Suite you will need a Servicekey. But what about the cases where it is not possible to use authentication.
If you have webhooks struggling with setting authentication or if you’re communicating with partners using AS2, this approach can streamline these interactions. And another perk—it lets you change the backend without a heads-up to your partners.
You can download the sample iflow here.
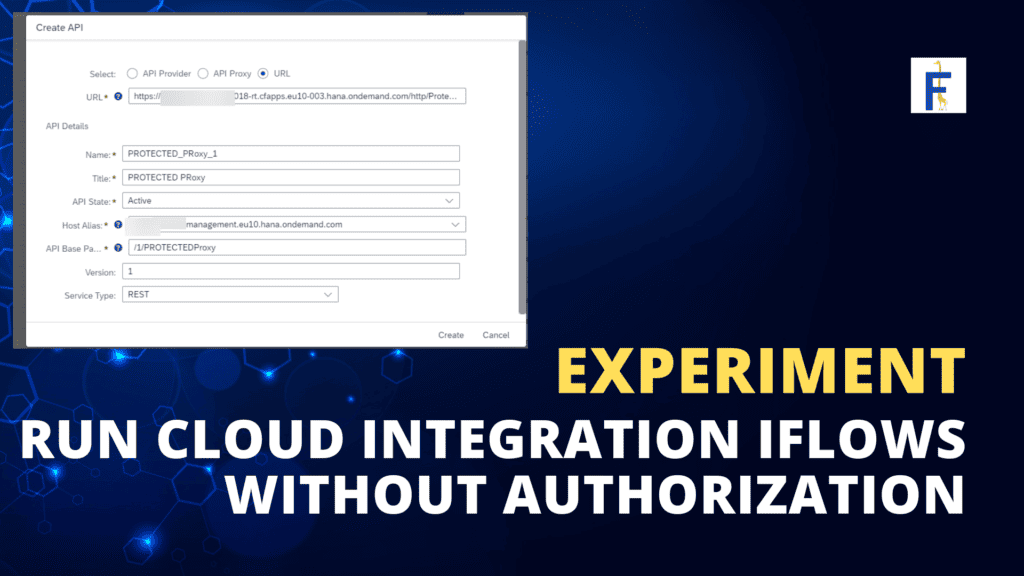
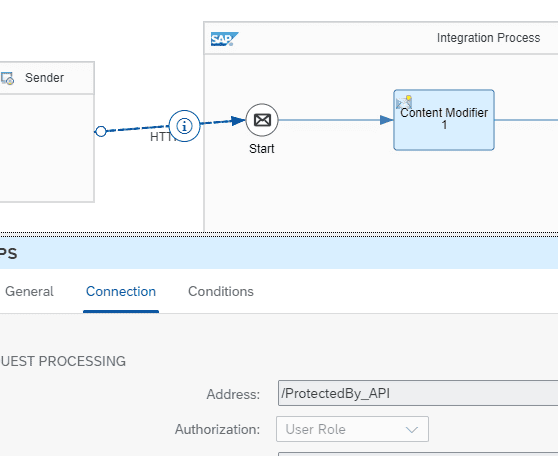
Start with the iFlow. Pick an iFlow to expose, set up its URL, and create a role allowing users to call this iFlow only.
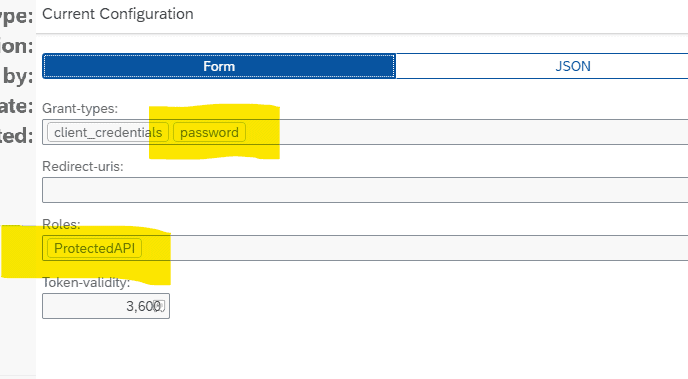
Create a Service Key. Head to your BTP cockpit, create a service key using the role, and grant access to the messaging API. Remember to use Grant type password. And then set the custom role into the roles section.
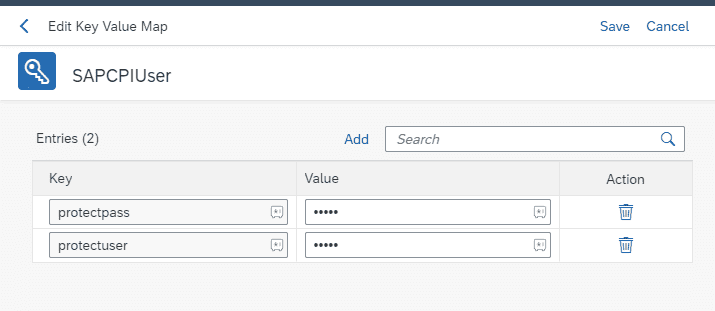
Dive into API Management. Set up a credential store to keep the service key and use it in the API proxies. Don’t forget to select encrypt it before inserting the clientid and clientsecret into the values.
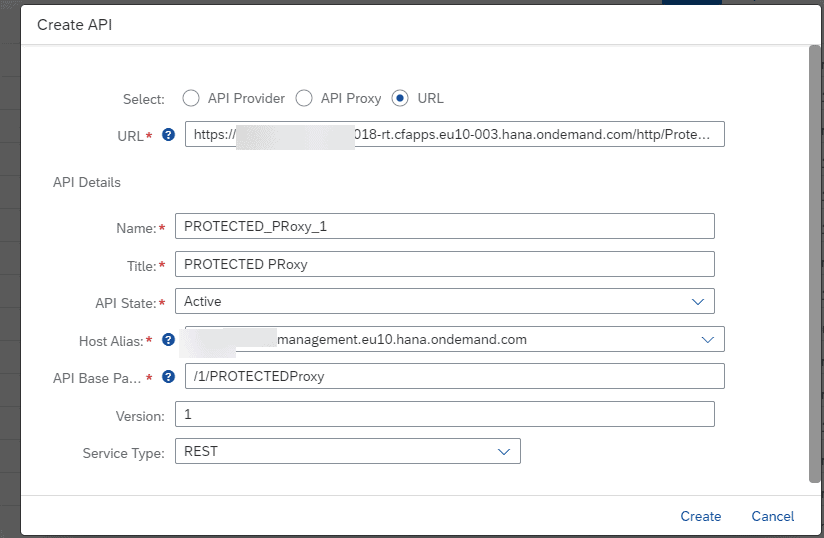
Create an API Proxy. Use the CPI endpoint as the target and make sure the exposed URL conveys what this API is all about clearly.
Add Policies to the Proxy. Once your API proxy is all set, it’s time to add the policies. Under the TargetEndPoint Preflow add the policy. The first policy to add is a key value map operation, and you need to link this to the KVM that you created earlier. It ensures everything is connected and running like a well-oiled machine. Because the KVM is encrypted the keys need to be using the prefix private.
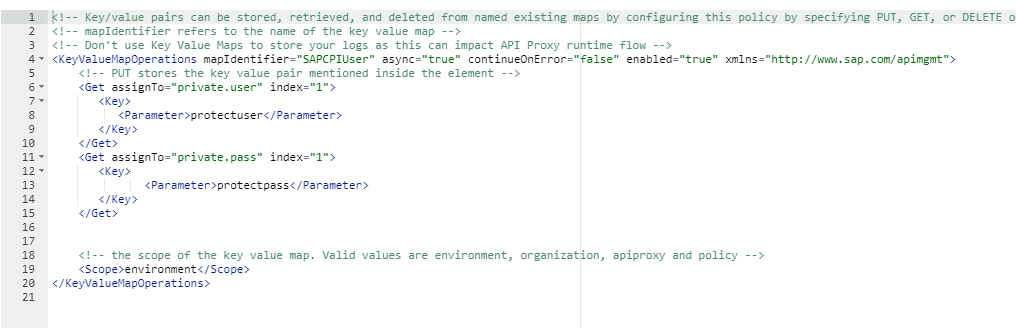
<KeyValueMapOperations mapIdentifier="SAPCPIUser" async="true" continueOnError="false" enabled="true" xmlns="http://www.sap.com/apimgmt">
    <Get assignTo="private.user" index="1">
       <Key>
          <Parameter>protectuser</Parameter>
       </Key>
    </Get>
    <Get assignTo="private.pass" index="1">
       <Key>
              <Parameter>protectpass</Parameter>
       </Key>
    </Get>
	<!-- the scope of the key value map. Valid values are environment, organization, apiproxy and policy -->
	<Scope>environment</Scope>
</KeyValueMapOperations>
Add Basic Authentication Policy. Next up, we’re adding a basic authentication policy. Use the variables picked out in the KVM and create a new request header authorization. It sets up the basic authentication needed to reach the backend of API management.
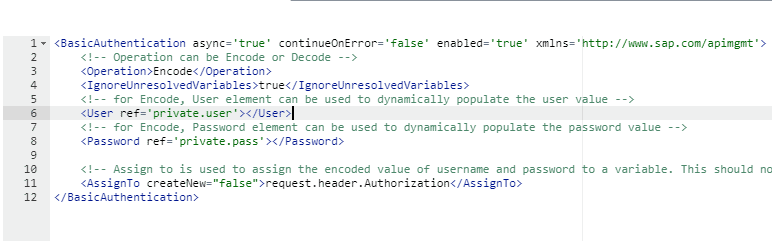
<BasicAuthentication async='true' continueOnError='false' enabled='true' xmlns='http://www.sap.com/apimgmt'>
<!-- Operation can be Encode or Decode -->
<Operation>Encode</Operation>
<IgnoreUnresolvedVariables>true</IgnoreUnresolvedVariables>
<!-- for Encode, User element can be used to dynamically populate the user value -->
<User ref='private.user'></User>
<!-- for Encode, Password element can be used to dynamically populate the password value -->
<Password ref='private.pass'></Password>
<!-- Assign to is used to assign the encoded value of username and password to a variable. This should not be used if the operation is Decode -->
<AssignTo createNew="false">request.header.Authorization</AssignTo>
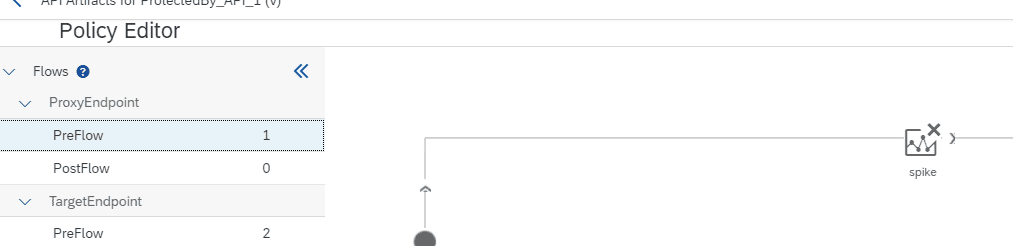
</BasicAuthentication>Under the Preflow you need to add some Traffic Management Policies to ensure the Cloud Integration is not overloaded. It can be spike, or some IP based policies.
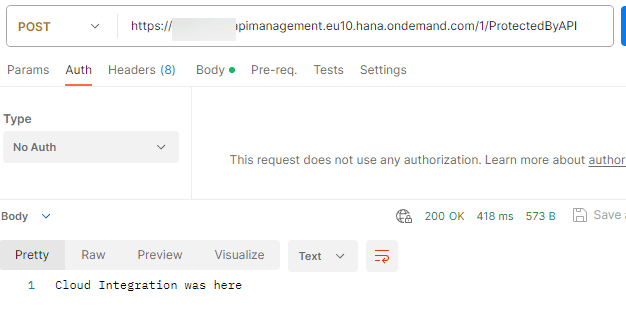
Test it Out! Finally, time to call this external endpoint! Check and see if it’s producing the right result, and voilà, you’re all set!
I hope you can see how this can simplify your setup.