
You can try Figaf in your migration projects for free. Just start a free trial and you can get started with the tool right away. Figaf covers all the needs you have for your migration projects.
When you are working on your SAP PI/PO to Integration Suite migration you will likely look at the different ICOs or Receiver Determinations for that matter and figure out how to handle the migration in the most simple way. With Figaf you can migrate both the same way, though some more functionality may exist around ICOs since it is our main focus for developing integration.
In a one to one migration you will need to migrate as much of the ICO as possible with the different changes required.
When working with the ICO you have multiple options that you could consider.
1) Profile
In the profile you enter what type of interface you are looking for. This is a hard coded logic about how to build the integration process based on the setup. This corresponds to SAPs templates though everything is created on the fly.
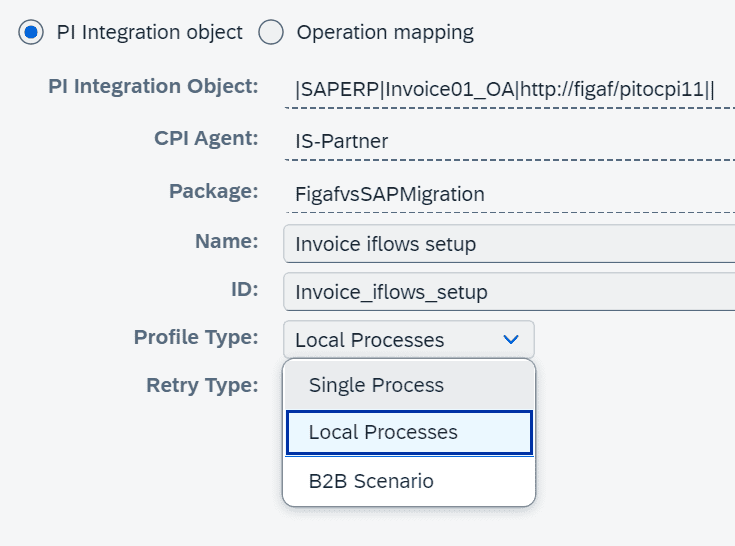
We currently have the following processes:
1) Local processes is the current recommended process. Here you get each receiver operation mapping in one local flow. It means that if one message fails then it can be delivered to JMS for retry
2) B2B: this is designed for migrating Operation mappings to be used in B2B Scenarios. This will only allow one Operation mapping per flow and then will be started with ProcessDirect that way it is easy to connect to the Trading Partner Management
3) Single Process: This was our first process we created. It can be used for some scenarios but we normally recommend the two others.
2) Channel mapping
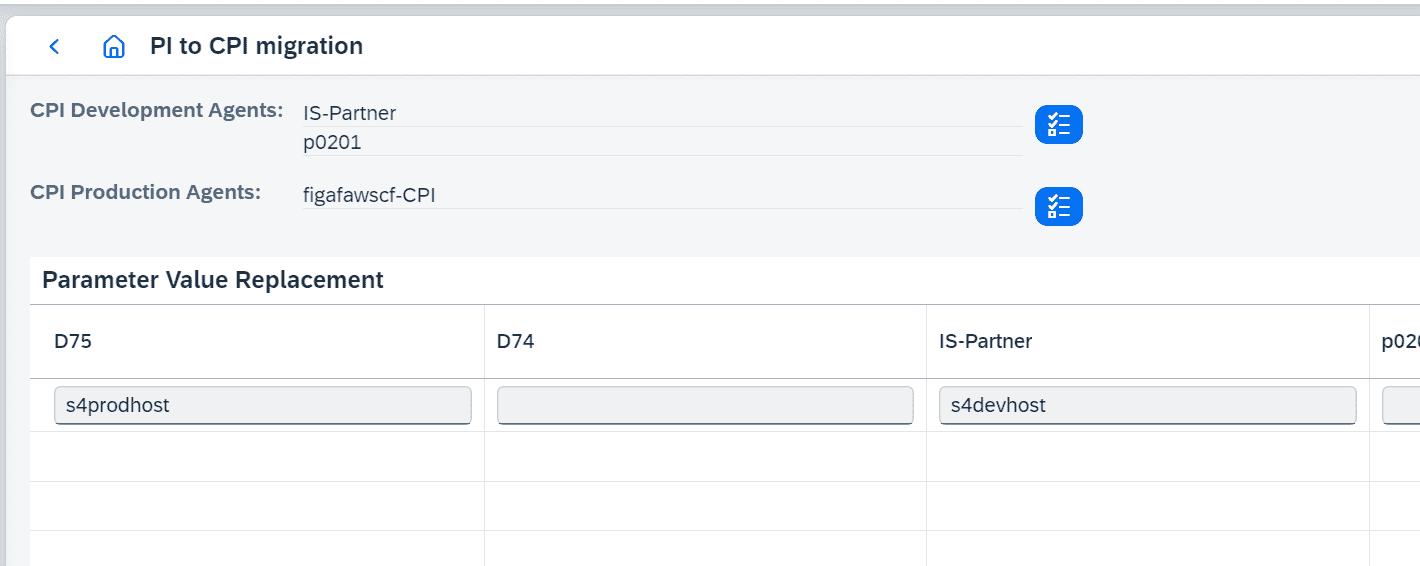
You need to perform a mapping between channels. It is a way to take what is configured in the PI communication channels and then converting them to Cloud Integration Channels.
The more you can translate from the PI channel the better but there are some limits on what is possible for that matter.

If you are migrating from Production PI to Dev Cloud Integration then it is possible to add translations from your production host names to Development host names. This just simplifies some things in the setup and ensuring you connect to the right backend.
3) Routing selection
When you are migrating you may not want to migrate all cases. There can be scenarios where you want to migrate all flows, either because it is for backup or some testing. It may also be the case that you want to change the flows to move the different conditions to separate iFlows. It does depend on what structure you expect to have. You can easily exclude certain parts and then perform a migration on them in a different flow.

Notice that if you have selected the B2B Scenario, you can only select one. Switching back and forth between B2B Scenario may cause problems for your selection.
4) Artifacts for migration
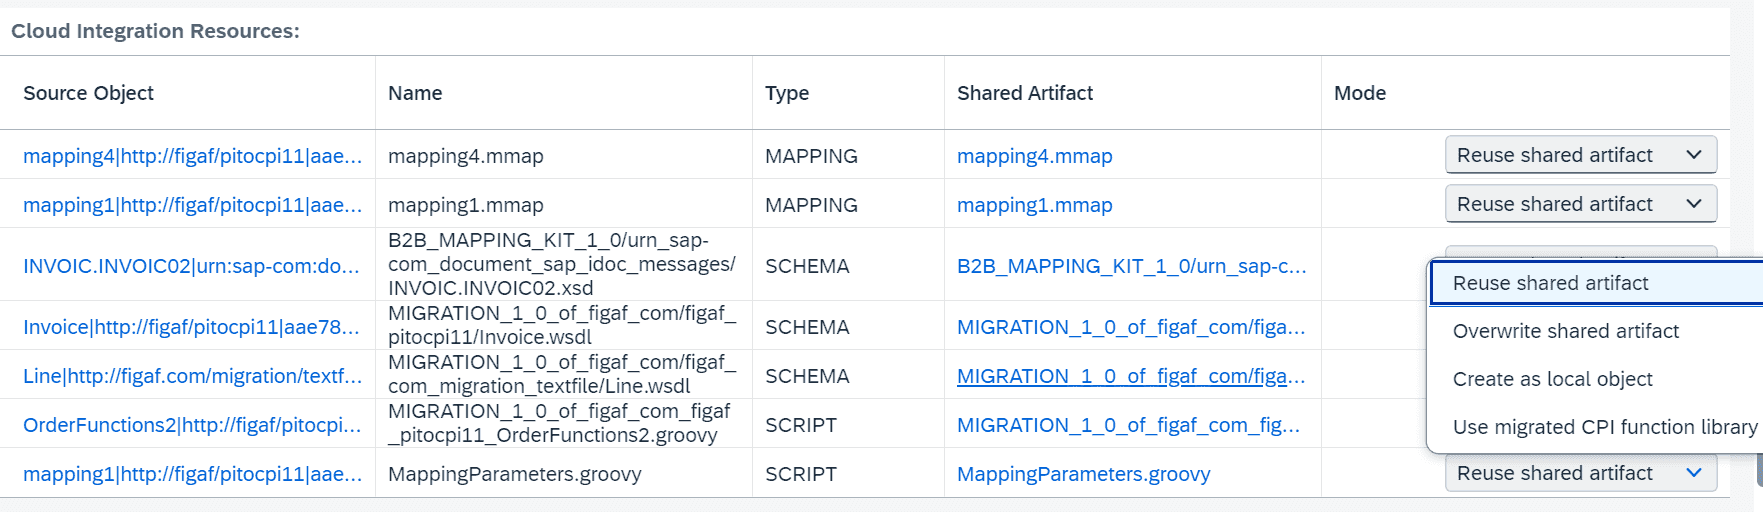
The important part of the migration journey is to keep the migrated data. This is in most cases your Message Mappings and Function Libraries that you are using.
With Figaf you can either reuse mappings and Function libraries you have migrated earlier. You need to select either to reuse or remigrate the content.
5) Preview of the migration
Before you click migrate check that the flow works as you would expect it to work. If it looks okay, migrate. If you have made any changes to the flow you need to run check first before you can preview.
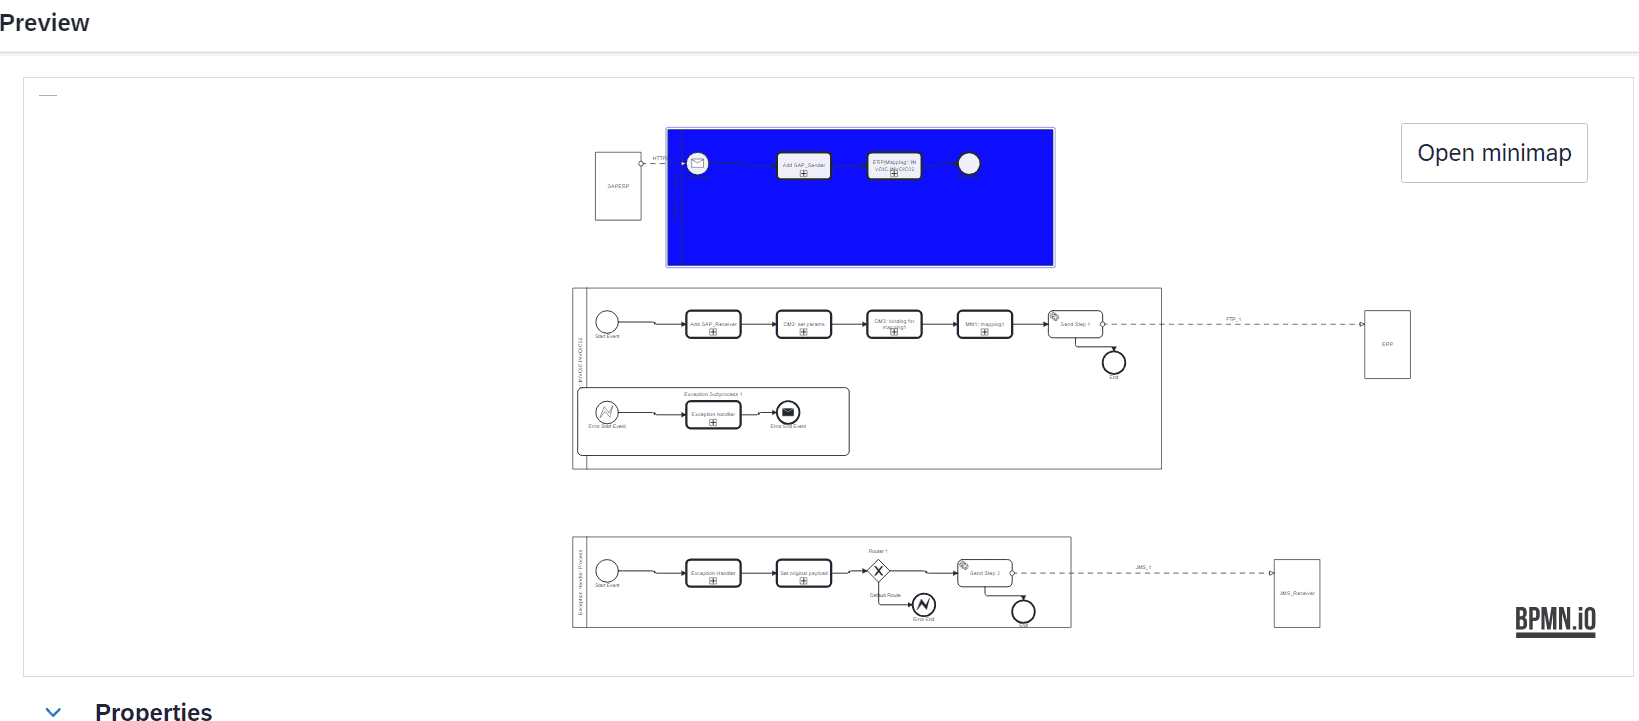
You need to ensure that the content can be created correctly. If it looks correct press the migrate button.
6) After migration
After you have performed the migration you need to ensure it is creating the expected result. We normally recommend that you go through your scenarios and check that everything is set up correctly. Like adapters and more. As you get more experience with the tool you will know better which areas are covered in the migration and what is not configured correctly. If you make changes in the iFlow remember to synchronize it into Figaf before starting to test it.
7) Testing
After the migration you should be testing the integration. Move testing as close to the development as possible. It is much easier to test when you are in the flow and are looking at an iFlow.