This post is part of a blog series that attempts to cover majority of your migration to SAP Integration Suite as a topic.
To see the index and first post in this series, you can go here.
You can use Figaf for free in your migration projects. Just sign up for the Free Migration Edition of the Figaf DevOps Suite. Then you can easily get started with using the tool. Figaf covers all the needs you have for your migration projects.
We covered a lot on migration of channels and some of the different things to be worry about. See here on how you can handle the different channels in the migration process.
Some scenarios may not very as much like SOAP sender but you will need to inform users about the change and give new credentials. While other need a different setup like File that needs to be moved to an SFTP channel. Or a JMS that need a special setup in AMQP.
If you just have under of a given channel, then just migrate them with what ever means you have. And then make the custom adjustments that are needed for it.
If you have more of the same channel it is worth considering to create a custom mapping of the setup. That way you know what data is being selected. To handle this we have a way for you to create a mapping of the communication channels.
The process is pretty simple and can be performed my all SAP Integration developers.
Mapping Channels Step-by-Step
1) Create an iFlow that work with the current channel you want to work with. Ensure you have the parts that need to be externalized setup correct. It is best if you use something that corresponds to an existing SAP PI Channel.
2) Go to the Channel Migraiton Templates in the PI to CPI migration Section
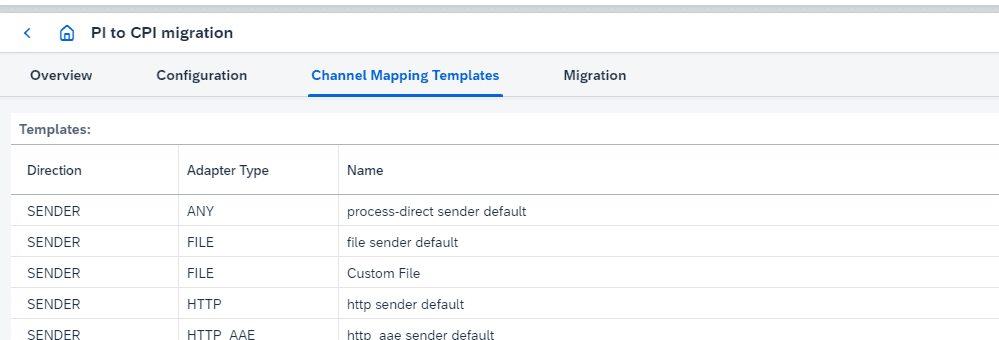
Here you can see the existing templates that exist. You can view the source of this and consider if you just want to copy them to modify it.
In most cases it is easier to create a fully new from scratch you do this at the plus button.
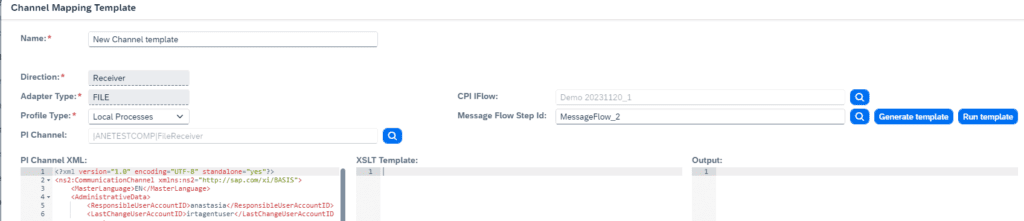
3) Enter that data you about the new channel mapper template.
Select the channel that you want to be using. Then the iflow and the place in the step you want from this. Then click Generate template.
4) Check the default template created. Here the tool have taken the information about what need to be setup at the channel. It comes with a number of paramters that you can use in the XSLT depending on what you want to setup.
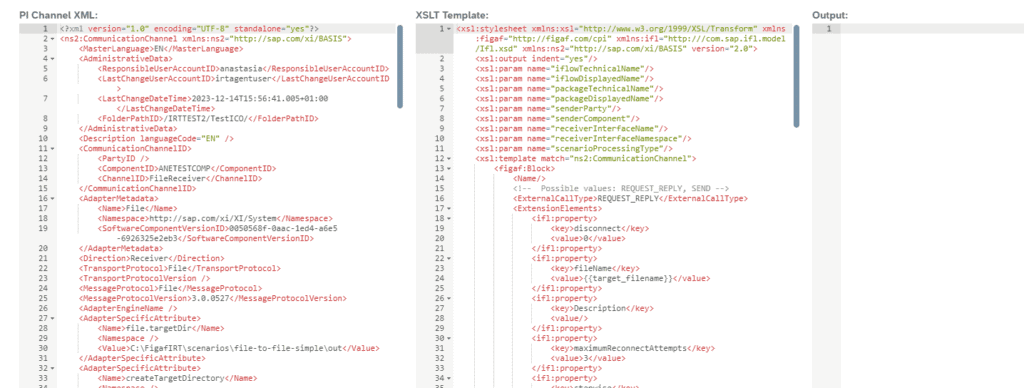
5) Go thru the document to clear up the stuff that you have in the list. Be sure to check the external properties this are marked with {{some}} value.
6) If there are any external properties and you have data you can use from the PI channel XML then you can use XSLT comments to lookup the content. Otherwise you can use the default values provided.
7) Notifications to users. Once a user is running a migration you can give them information about what should be checked. It could be to ensure the password has been created or some other notification or error you want to display to the user.
8) Try to run the result. This will run the XSLT with the sample PI channel and you can see if it produces the expect payload.
9) Press save to save the new template
10) Try to use the template in a new migration to see if it creates the expect channel for the new template. Then your and the team can select this when they are working on a migration of channels of that type. Now you have a new channel template that you can use for future scenarios.